Skip to content
Table of Contents
- Identify the Noise Your Dryer Is Making
- Noise-to-Part Diagnostic: What Each Sound Points To
- Dryer Squeaking Noise: Causes and Fixes
- Dryer Drum Roller Replacement: When and How
- Gas vs. Electric Dryers: Noise Differences That Matter
- DIY Repair vs. Calling a Pro: Cost-Benefit Breakdown
- Dryer Maintenance Tips to Prevent Noise Problems
- Frequently Asked Questions
Last Updated: September 1, 2026
Identify the Noise Your Dryer Is Making
A dryer making noise is one of the most common appliance complaints homeowners face, and the type of sound is your first diagnostic clue. Run the dryer empty to isolate mechanical noise from load-related noise, then run it with a small, balanced load. The difference tells you a lot.
Squealing or Squeaking
A high-pitched squeal typically points to friction between moving parts: worn drum glides, a failing idler pulley, or a fraying drive belt. Squealing that worsens as the dryer warms up often signals bearing wear.
Rattling or Clanking
Rattling could be coins, zippers, or small hardware tumbling inside the drum. Persistent rattling that doesn’t stop when you remove the load usually points to a loose blower wheel, worn drum support, or hardware vibrated loose inside the cabinet.
Thumping or Rumbling
A rhythmic thumping that pulses with every drum rotation is the signature sound of worn drum rollers. The drum support rollers sit on shafts, and when the roller material wears flat or the shaft seizes, the drum bounces rather than rolls smoothly.
Grinding or Buzzing
Grinding usually means metal-on-metal contact, indicating a seized drum bearing, blower wheel clogged with lint, or a motor pulley worn through its housing. Buzzing at startup may point to a motor starting capacitor issue. Don’t ignore grinding: continued operation accelerates damage significantly.
Noise-to-Part Diagnostic: What Each Sound Points To
Matching the sound to the part is the fastest way to stop guessing and start fixing.
| Sound Type | Most Likely Part | Secondary Cause | Urgency |
|---|---|---|---|
| Squealing / Squeaking | Idler pulley, drum glides | Drive belt fraying | Moderate |
| Rattling / Clanking | Coins/items in drum | Loose blower wheel | Low to Moderate |
| Thumping / Rumbling | Worn drum rollers | Unbalanced load | Moderate |
| Grinding | Drum bearing, motor pulley | Blower wheel obstruction | High |
| Buzzing at startup | Motor capacitor | Blower wheel restriction | High |
| Squealing + burning smell | Drive belt slipping | Worn tensioner | Urgent |
If your dryer is making a grinding noise combined with a burning smell, stop using it immediately and disconnect it from the power source. Continued operation risks damaging the motor and can create a fire hazard from lint buildup near overheating components.
Dryer Squeaking Noise: Causes and Fixes
Squeaking is the most fixable dryer noise. The two primary culprits are worn drum glides with a deteriorating felt seal, and a failing idler pulley or drive belt.
Worn Drum Glides and Felt Seal
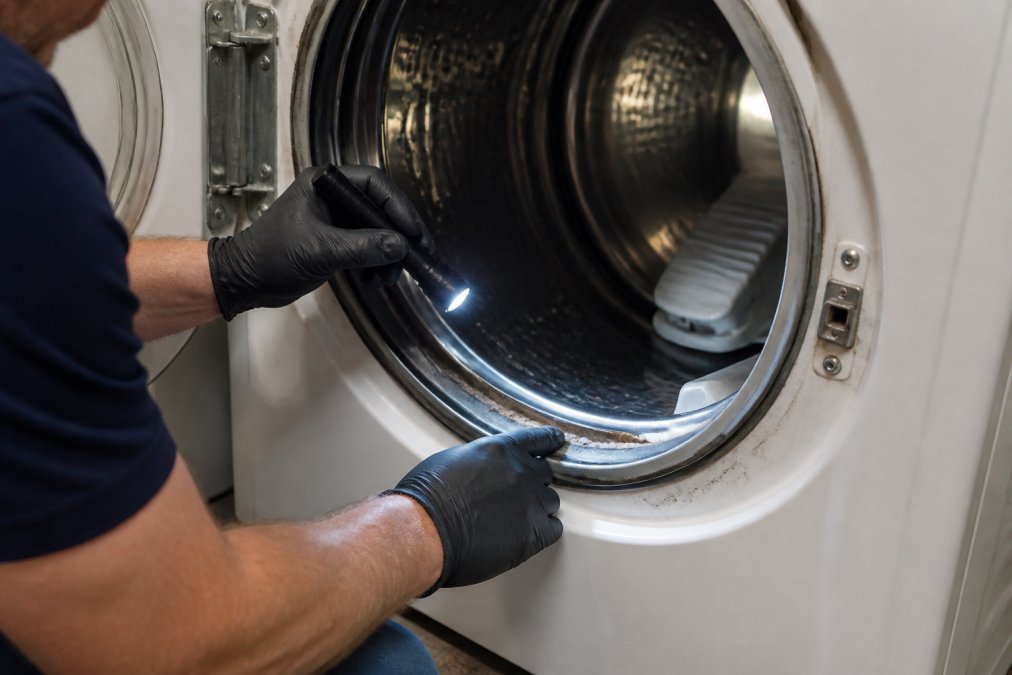
Drum glides are small plastic or nylon pads that support the front edge of the drum as it rotates. The felt seal runs along the drum’s front and rear edges, creating a soft barrier between the drum and the cabinet. When drum glides wear through, the drum makes direct contact with the cabinet’s metal frame. When the felt seal deteriorates, the drum edge drags unevenly. Both produce a squealing or scraping sound consistent throughout the cycle.
Replacing drum glides and the felt seal is a moderate DIY repair requiring removal of the front panel and drum. According to [appliance repair(/appliance-repair-bowie-md/) guidance from the U.S. Consumer Product Safety Commission | cpsc.gov], always disconnect the appliance from its power source before performing any internal inspection or repair.
Idler Pulley and Drive Belt Problems
The idler pulley is a spring-loaded tensioner that keeps the drive belt taut around the drum and motor pulley. As the pulley bearing wears, it creates friction that produces a squealing sound, often one that changes pitch as the dryer heats up.
The drive belt can also squeal when it begins to crack or fray. A belt in poor condition may slip on the motor pulley, producing an intermittent squeal that sometimes smells faintly of rubber.
To inspect the idler pulley: remove the front or rear panel, locate the tensioner, and spin the pulley by hand. It should spin freely and quietly. Any roughness, wobble, or resistance means replacement is needed. Drive belt inspection is visual: look for cracks, glazing, or fraying along the belt’s inner surface.
When replacing the idler pulley, replace the drive belt at the same time. Both parts are inexpensive, and the labor to access them is identical. Replacing both in one visit is standard practice among experienced appliance technicians.
Dryer Drum Roller Replacement: When and How
Drum rollers support the rear of the drum and spin continuously every time the dryer runs. They wear out, and knowing when they’ve worn enough to cause problems is key.
Signs Your Drum Rollers Are Worn
The clearest sign is a rhythmic thumping that pulses in time with drum rotation. Other indicators include a rumbling sound that gets louder as the dryer warms up, visible flat spots on the roller surface, rollers that don’t spin freely on their shafts, or a drum that wobbles when the front panel is removed.
A useful test: open the dryer, rotate the drum manually, and feel for resistance or grinding. If the drum wobbles, the rollers or their shafts are the likely source.
Step-by-Step Drum Roller Replacement
What you’ll need: Replacement drum rollers (model-specific), screwdrivers, a nut driver set, work gloves, and a clean surface to lay out parts. Total estimated time: 60-90 minutes for an experienced DIYer.
- Disconnect the power source. Unplug the dryer or switch off the circuit breaker. For gas dryers, also shut off the gas supply valve.
- Remove the lint screen and top panel. Most top panels are secured by screws at the rear or clips at the front.
- Detach the front panel. Disconnect the door switch wiring harness before fully removing the panel.
- Support and remove the drum. Slide the drive belt off the motor pulley and idler pulley, then carefully lift the drum out of the cabinet.
- Locate the drum rollers. They sit on shafts at the rear of the cabinet. Note their orientation before removing.
- Remove the worn rollers. Slide each roller off its shaft and inspect the shaft for wear or corrosion.
- Install new rollers. Press the new rollers onto the shafts until they seat fully. They should spin freely.
- Reassemble in reverse order. Route the drive belt correctly around the drum, motor pulley, and idler pulley.
- Run a test cycle. Start with an empty drum and listen for any remaining noise before loading laundry.
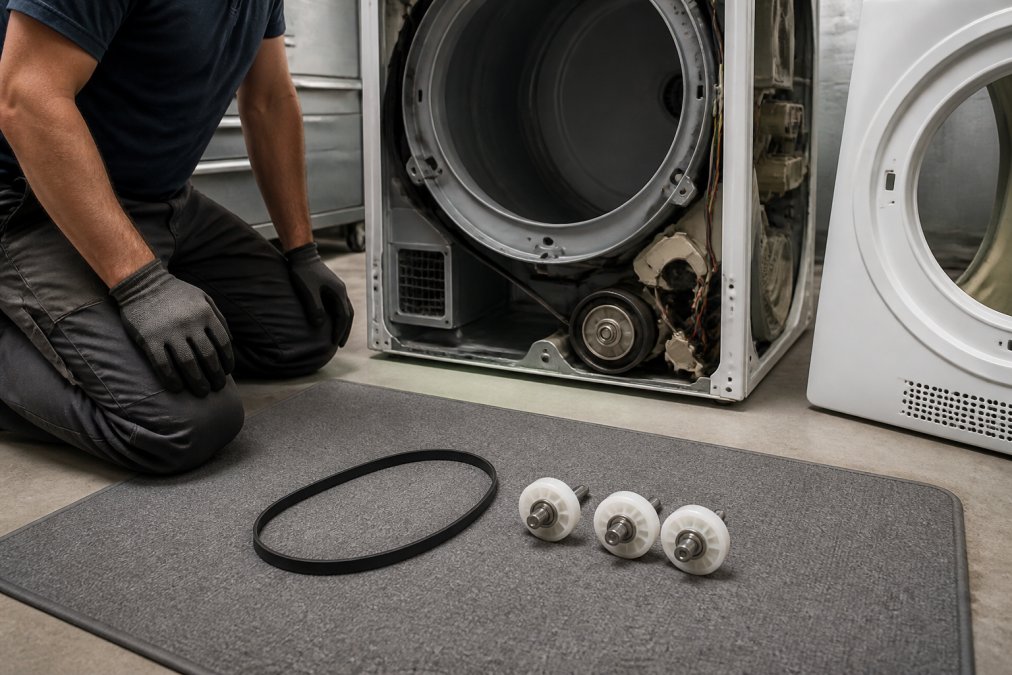
Drum roller replacement requires navigating wiring harnesses and spring-loaded components. If you’re not confident working with appliance internals, a professional visit prevents mistakes and safety risks.
Gas vs. Electric Dryers: Noise Differences That Matter
Most dryer noise troubleshooting applies equally to gas and electric models. The drum, rollers, idler pulley, drive belt, and blower wheel are mechanically identical. But there are two noise differences worth knowing.
Gas dryers have an igniter and gas valve solenoids. When a gas dryer starts a heating cycle, you may hear a soft clicking sound as the igniter activates, followed by a low whomp as the burner lights. This is normal. Repeated clicking without ignition or buzzing from the gas valve area can indicate a failing igniter or solenoid coil.
Electric dryers have heating elements. These rarely produce noise, but a failed heating element partially grounding against the cabinet can occasionally cause buzzing or humming during the heat cycle.
The blower wheel is a common noise source in both types. Lint buildup around the blower wheel restricts airflow and causes rattling or vibrating sounds. Gas dryer repairs involving the burner assembly, gas valve, or igniter should be handled by a technician with gas appliance experience. Electric dryer repairs are more accessible to confident DIYers.
DIY Repair vs. Calling a Pro: Cost-Benefit Breakdown
Whether to fix it yourself depends on the specific part, your comfort level with appliance disassembly, and the age of the machine.
Repairs that are reasonable DIY projects:
- Removing items from the drum
- Cleaning lint buildup from the blower wheel and ventilation path
- Replacing drum glides and felt seal on accessible models
- Replacing drum rollers on front-load style cabinets
Repairs that typically warrant a professional:
- Drive belt replacement combined with idler pulley and tensioner work
- Drum bearing replacement
- Motor or blower wheel replacement
- Any gas-related component
As a general guideline from appliance lifespan data from Energy Star, dryers typically have a useful life of around 10-13 years. If your machine is approaching that range and needs a major mechanical repair, replacement may be more practical. For a dryer under 8 years old with a clearly identified mechanical failure, repair almost always makes financial sense.
| Repair Type | DIY Feasibility | When to Call a Pro |
|---|---|---|
| Drum glides / felt seal | Moderate | If drum bearing is also worn |
| Idler pulley + drive belt | Moderate | Combined with motor issues |
| Drum rollers | Moderate | Rear drum bearing access needed |
| Blower wheel cleaning | Moderate | Lint compacted around motor |
| Drum bearing | Low | Almost always |
| Gas valve / igniter | Very Low | Always |
Dryer Maintenance Tips to Prevent Noise Problems
The best dryer noise is no dryer noise. Most mechanical failures develop gradually, and basic maintenance catches problems before they become expensive.
Clean the lint filter after every load. Restricted airflow forces the motor and blower wheel to work harder, accelerating wear on both.
Inspect and clean the exhaust vent annually. Lint buildup in the ventilation duct is a fire risk and noise contributor. The U.S. Fire Administration’s guidance on dryer fire prevention identifies clogged venting as the leading cause of dryer fires.
Check leveling legs every six months. An unbalanced dryer vibrates excessively, accelerating wear on drum rollers, the idler pulley, and the cabinet.
Run an empty hot cycle quarterly. This burns off lint accumulation inside the drum and around the felt seal, and gives you a clean acoustic baseline to notice if new noises develop.
Listen during the first five minutes of each cycle. Most mechanical noise is loudest at startup. Catching a new squeak or rattle early means catching a small repair before it becomes a large one.
A dryer making noise rarely fixes itself. Mechanical components involved in most noise problems only degrade further with continued use. Catching the problem early almost always means a simpler, less expensive repair.
Preventative Maintenance Schedule:
| Task | Frequency | DIY or Pro |
|---|---|---|
| Clean lint filter | After every load | DIY |
| Inspect exhaust vent duct | Every 6 months | DIY |
| Clean blower wheel area | Annually | DIY or Pro |
| Check leveling legs | Every 6 months | DIY |
| Inspect drum glides and felt seal | Every 2-3 years | Pro recommended |
| Inspect drum rollers and idler pulley | Every 3-5 years | Pro recommended |
| Full mechanical inspection | Every 5 years | Pro |
If your dryer is making noise that you can’t resolve with basic troubleshooting, a professional diagnosis prevents the guesswork from turning into a more expensive repair. Bell Appliance Repair LLC has been serving homeowners since 2017 with fast, on-time service and technicians who specialize in exactly these kinds of mechanical appliance failures. Call (240) 230-7699 to schedule an appointment and get a clear answer on what’s causing the noise and what it will take to fix it.
Frequently Asked Questions
Is it safe to use a noisy dryer?
It depends on the noise. A light rattling from coins or zippers is harmless. But grinding, squealing, or thumping that persists usually signals a failing part, worn drum rollers, a fraying drive belt, or a seized idler pulley. Running the dryer with a mechanical failure can worsen the damage, overheat the motor, or create a fire hazard from lint buildup near a failing blower wheel. Stop using it and diagnose the cause before running another load.
Can a loose drum roller cause dryer noise?
Yes. Worn or loose drum rollers are one of the most common sources of dryer noise. When the rubber on the rollers wears down or the roller shaft becomes loose, the drum loses smooth support and produces a thumping or rumbling sound during every rotation. In some cases, a flat spot on the roller causes a rhythmic thump that speeds up with the drum. Replacing drum rollers typically requires disassembling the dryer cabinet, so this is a repair many homeowners choose to hand off to a technician.
What does a bad dryer motor sound like?
A failing dryer motor usually produces a loud humming or buzzing sound, sometimes accompanied by grinding if the motor bearings are worn. You may also notice the drum struggling to start or stopping mid-cycle. Because the motor also drives the blower wheel, a bad motor can reduce airflow and cause the dryer to overheat. Motor replacement is one of the more involved dryer repairs, if you hear persistent buzzing or the drum won’t turn at all, have a technician assess it before the motor fails completely.
How do I stop my dryer from making noise?
Start by checking the drum for loose items like coins, zippers, or bra underwires, these cause rattling and clanking. Make sure the dryer sits level on all four leveling legs. If the noise is a squeal, inspect the idler pulley, drive belt, and drum glides for wear. A thumping sound usually points to worn drum rollers or a drum bearing. Addressing lint buildup in the blower wheel and vent can also reduce buzzing. For anything beyond basic checks, a professional diagnosis saves time and prevents further damage.
This article was written using GrandRanker